Socket.IO는 실시간 웹 애플리케이션을 위한 이벤트 기반 라이브러리이다. 웹 클라이언트와 서버 간의 실시간 양방향 통신을 가능케 한다. 


https://socket.io/


Socket.IO

Reliable Rest assured! In case the WebSocket connection is not possible, it will fall back to HTTP long-polling. And if the connection is lost, the client will automatically try to reconnect.

socket.io


MongoDB를 이용해, 로그인 시, 대화 목록을 가져옴.

socket io로 실시간 대화 송수신.


socket io- Server


3000포트(클라이언트)와의 CORS(Cross-Origin Resource Sharing)를 막기 위해 설정해준다.

// server/socket.ts

import { Server } from "socket.io";
import http from "http";
import express from "express";

const app = express();

const server = http.createServer(app);
const io = new Server(server, {
  cors: {
    origin: ["http://localhost:3000"],
    methods: ["GET", "POST"],
  },
});


온라인 유저 목록 송신- server


- io.on: 서버와 클라이언트에서 사용되는 수신용 이벤트리스너이다.

// server/socket.ts
io.on("connection", (socket) => {
  console.log("a user connected", socket.id); // 출력) a user connected ihbfG-so_-acDN7SAAAB

- 클라이언트와 연결되면, 클라이언트의 소켓 아이디를 출력한다.


- 소켓에 연결된 유저 목록을 클라이언트로 넘겨주는 작업

interface UserSocketMap {
  [key: string]: string;
}

const userSocketMap: UserSocketMap = {}; // {userId: socketId}
 const userId: string = socket.handshake.query.userId as string;
  if (userId !== "undefined") userSocketMap[userId] = socket.id;

// 유저 _id 배열을 넘겨준다.
  io.emit("getOnlineUsers", Object.keys(userSocketMap));


- userSocketMap(object)에 저장된 값


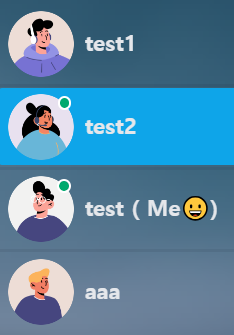
온라인 유저 목록 수신: client

- 클라이언트에서 이벤트 리스너로 서버로부터 유저 _id 배열을 받아서

현재 접속 중인 유저 목록을 Context API로 전역적으로 저장하고 관리한다.

  useEffect(() => {
    if (authUser) {
      const socket = io("http://localhost:5000", {
        query: {
          userId: authUser._id,
        },
      });

      setSocket(socket);

      socket.on("getOnlineUsers", (users) => {
        setOnlineUsers(users);
      });


온라인 상태인 유저


- Context API를 사용하는 이유: 

보통 애플리케이션 UI 랜더링 데이터로는 전역 상태 관리로는 Redux, Recoil, zustand... 등이 있지만,

Context API는 소켓과 같은 인스턴스 및 함수를 저장하는데 적합하다.


메시지 송신- client


메시지 보내기


클라이언트) 

	try {
			const res = await fetch(`/api/messages/send/${selectedConversation._id}`, {
				method: "POST",
				headers: {
					"Content-Type": "application/json",
				},
				body: JSON.stringify({ message }),
			});
			const data = await res.json();


메시지 수신- server


발신자와 수신자 ID 저장)

 const { message } = req.body;
        const { id: receiverId } = req.params;

        const senderId = req.body.user._id;


발신자와 수신자 사이에 기존 대화를 찾기)

- 대화가 존재하지 않으면 발신자와 수신자를 참가자로 하는 새로운 대화를 생성한다.

let conversation = await Conversation.findOne({ participants: { $all: [senderId, receiverId] }, });

if (!conversation) { ... }:

   ** $all 연산자: 배열 필드가 주어진 모든 값을 포함하는 문서를 찾는데 사용 ** 


새 메시지를 생성)

- 새 메시지가 성공적으로 생성되면, 그 메시지의 ID를 대화의 메시지에 추가한다.

const newMessage = new Message({ senderId, receiverId, message, });

if (newMessage) { ... }


대화와 새 메시지를 데이터베이스에 저장)

- Promise.all은 해당 작업을 병렬로 수행하여 성능을 향상시킵니다.

await Promise.all([conversation.save(), newMessage.save()]);


수신자의 소켓 ID를 검색) 

수신자의 소켓 ID가 발견되면, 새 메시지와 함께 수신자의 소켓에 newMessage 이벤트를 전송합니다.

수신자의 클라이언트는 새 메시지로 즉시 업데이트.

const receiverSocketId = getReceiverSocketId(receiverId);

if (receiverSocketId) { ... }


실시간 메시지 송-수신- client


server)

if (receiverSocketId) {
            io.to(receiverSocketId).emit("newMessage", newMessage);
        }


client)

 useEffect(() => {
        socket?.on("newMessage", (newMessage: any) => {
            newMessage.shouldShake = true;
            const sound = new Audio(notificationSound);
            sound.play();
            dispatch(setMessages([...messages, newMessage]))
        });

        return () => socket?.off("newMessage");
    }, [socket, setMessages, messages]);
};


'IT > Backend' 카테고리의 다른 글

[BE] JWT 로그인 환경 구축  (0) 2024.02.03


JWT(Json Web Token) 방식으로 로그인 구축 해봤다. (MERN)


장점: 

  • 토큰을 클라이언트 쪽에 저장하여서 서버쪽에서는 Stateless하다. 서버의 부하를 줄일 수 있다.
  • OAuth에 경우, 구글, 페이스북 등 소셜 계정을 이용하여 로그인 할 수 있는 확장성이 있다.

단점:

  • 클라이언트에 저장되므로, XSS(크로스 사이트 스크립팅)공격에 취약하다.
  • 한 번 발급되면 만료 시간까지 무효화 할 수 없어서, 토큰이 탈취 당하면 곤란할 수 있다.
    (예방: 토큰 만료기간을 짧게 가져간다.)


JWT 구조

- .(점) 을 기준으로 3 부분으로 나뉘어있다.

  • 헤더, Payload, 1,2로 생성된 해쉬된 서명키가 세번째 문자열이다.


const token = jwt.sign(
      { name: user.name, id: user._id },
      process.env.JWTKEY!,
      { expiresIn: "1h" }
    );


- 두 번째에 해당하는 값을 추정 당하지 않게 자기만 알 수 있는 값으로 설정하고.

- 안전하게 환경변수(dotenv) 로 사용해주었다.


node 서버


//server.ts
dotenv.config();
const PORT = process.env.PORT || 5000;

const app = express();
app.use(cors());
const server = createServer(app);

// body 데이터를 json형식으로 사용:
//json 형태의 데이터를 해석- body-parser 기능 포함
app.use(express.json());
// x-www-form-urlencoded 형태 데이터 해석
app.use(express.urlencoded({ extended: false }));

const MONGO_KEY = process.env.MONGO_URI!;
mongoose
  .connect(MONGO_KEY)
  .then(() => console.log("MongoDB connected !!"))
  .catch((err) => console.log("mogo error", err));

app.use("/api/auth", AuthRoute);

server.listen(PORT, () => {
  console.log(`listening on *:${PORT}`);
});


Mongo DB에 저장된 회원 확인 (인증, Authentication)


📦server
 ┣ 📂controllers
 ┃ ┗ 📜AuthController.ts
 ┣ 📂middleware
 ┃ ┗ 📜authMiddleware.ts
 ┣ 📂models
 ┃ ┗ 📜userModel.ts


- (회원가입)  mongo DB에 회원 정보 저장 (name: string, password: string)

  -여기서 password는 "bcrypt" 라이브러리로 암호화된 패스워드로 변경해주었다.

// AuthController.ts

export const registerUser = async (req: Request, res: Response) => {
  const salt = await bcrypt.genSalt(10);
  const hashedPass = await bcrypt.hash(req.body.password, salt);
  req.body.password = hashedPass;


- 해당 name으로된 회원이 있으면 에러 반환

const newUser = new User(req.body);
  const { name } = req.body;

  try {
    const oldUser = await User.findOne({ name: name });
    console.log(oldUser);
    if (oldUser) return res.status(400).json({ error: "User already exists" });

    const user = await newUser.save();
 
    return res.status(200).json({ user, message: "User created successfully" });
  } catch (error: any) {
    const error_msg = error as mongoose.Error;
    return res.status(500).json({ message: error_msg });
  }
};


- (로그인)

- mongoDB에서 해당 name으로 된 유저를 찾고, 입력한 패스워드와
디코드한 DB상의 패스워드를 비교해 일치하지 않으면 에러 반환

export const loginUser = async (req: Request, res: Response) => {
  const { name, password } = req.body;

  try {
    const user = await User.findOne({ name: name });

    if (user) {
      const validity = await bcrypt.compare(password, user.password);

      if (!validity) {
        return res.status(400).json({ error: "wrong password" });
      }


- 일치하면 토큰을 생성하고, 클라이언트로 헤더와 바디 중 HTTP 응답 헤더에 토큰을 담아서 반환 시킨다.

- 이렇게, 반환하면 헤더 본문을 오염시키지 않는다는 장점이 있다.

else {
        const newToken = jwt.sign(
          { name: user.name, id: user._id },
          process.env.JWTKEY!,
          { expiresIn: "1h" }
        );
        const refreshToken = jwt.sign(
          { name: user.name, id: user._id },
          process.env.REFRESH_JWTKEY!,
          { expiresIn: "7d" }
        );
        res.setHeader("x-auth-token", newToken);
        res.setHeader("x-refresh-token", refreshToken);
        return res
          .status(200)
          .json({ success: "Login success", user: { name: user.name } });
      }


(인가, Authorization)

- 사용자가 회원이여야만 가능한 작업들 사이에 인증 토큰을 확인 받고,
사용자가 맞으면 인가를 받고 그 작업을 수행할 수 있는 상태로 만든다.


  • 로그인에 성공하면, localstorage에 토큰을 저장한다.
  • 그 토큰을 axios 헤더에 넣어서, 서버와 통신을 할 때 마다 인가를 받을 수 있게 만든다.
// authSlice.ts
if (token) {
  axios.defaults.headers.common["Authorization"] = `Bearer ${token}`;
} else {
  delete axios.defaults.headers.common["Authorization"];
}


- headers.authorization 토큰을 이용해 해당 유저 정보를 찾는다.

// authMiddleware.ts

// protect 미들웨어
const protect = expressAsyncHandler(
  async (req: Request, res: Response, next: NextFunction) => {
    let token;

    if (
      req.headers.authorization &&
      req.headers.authorization.startsWith("Bearer")
    ) {
      try {
        // Get token from header
        token = req.headers.authorization.split(" ")[1];

        // Verify token
        const decoded = jwt.verify(token, process.env.JWTKEY!);

        // Get user from the token
        req.body = await User.findById(
          (decoded as jwt.JwtPayload).id as jwt.JwtPayload
        );

        next();
      } catch (error) {
        console.log(error);
        res.status(401).json({ error: "Not authorized, token failed" });
      }
    }


-req.body 결과값:


- 만약, 토큰이 만료됐다면, refreshtoken으로 새로운 토큰을 생성해준다.

 else {
      // Check for refresh token

      const refreshToken = localStorage.getItem("refreshToken");
      if (refreshToken) {
        try {
          // Verify refresh token
          const decoded = jwt.verify(refreshToken, process.env.REFRESH_JWTKEY!);

          // Get user from the refresh token
          req.body = await User.findById(
            (decoded as jwt.JwtPayload).id as jwt.JwtPayload
          );

          next();
        } catch (error) {
          console.log(error);
          res
            .status(401)
            .json({ error: "Not authorized, refresh token failed" });
        }
      } else {
        res.status(401).json({ error: "Not authorized, no token" });
      }
    }
  }
);


export default protect;


토큰 실사용: 계정 삭제

// AuthRoute.ts

import protect from "../middleware/authMiddleware";
router.post("/delete", protect, deleteUser);


- 유저 삭제와 같은 인가가 필요한 작업에 위에서 토큰을 통한 인가 관련 미들웨어를
넣어서, 토큰이 유효하면 유저를 삭제한다.


이미지


(로그인) 


(유저 삭제)


(로그아웃)

토큰 제거


'IT > Backend' 카테고리의 다른 글

[BE] Socket io로 통신하기  (1) 2024.02.12

+ Recent posts